Learn The Colony’s shoreline trails a piece at a time
Choose one official trail access point and a first stretch that suits your available time.

In this article
The easiest way to learn The Colony’s shoreline trails is to choose the approach before choosing the distance. A walker with a short afternoon can arrive at one familiar trailhead, follow a recognizable stretch and return the same way. Someone with more time can make a separate visit from the opposite end and see how the paths connect on the city map. The two outings fit different schedules and avoid making everyone complete a full trail the first time they see it.
The City of The Colony’s trail directory describes the 3.5-mile The Colony Shoreline Trail between Stewart Creek Park and Ridgepointe Park. It separately lists The Tribute Shoreline Nature Trail. Use the full trail name when arranging to meet somebody. Both appear in the city’s shoreline trail information, but the city describes them with different access arrangements. Pick the one you mean and name its official entry point before giving anybody a starting time.
Choose a known start and a short return
Look at the city’s Shoreline Trail map before trying to plot a trip between parks. Notice which endpoints and neighborhoods it labels. The graphic can help you place the route beside Lewisville Lake. Use current city notices and signs for restrictions or conditions on the day of your walk. An older map shows the intended connection, and the date and conditions of your visit determine which part is available to you now.
Select a first stretch by deciding how far the group can comfortably go and return. A person walking with a child or stopping to observe birds may need more time than somebody walking continuously. Choose one recognizable turnaround point identified by the route, such as an established junction, crossing or marker you actually see. Agree to turn back sooner if the path or time does not suit the group. Give each visitor the official access name and the agreed place where the outing ends.
Try Ridgepointe as one end of the trail
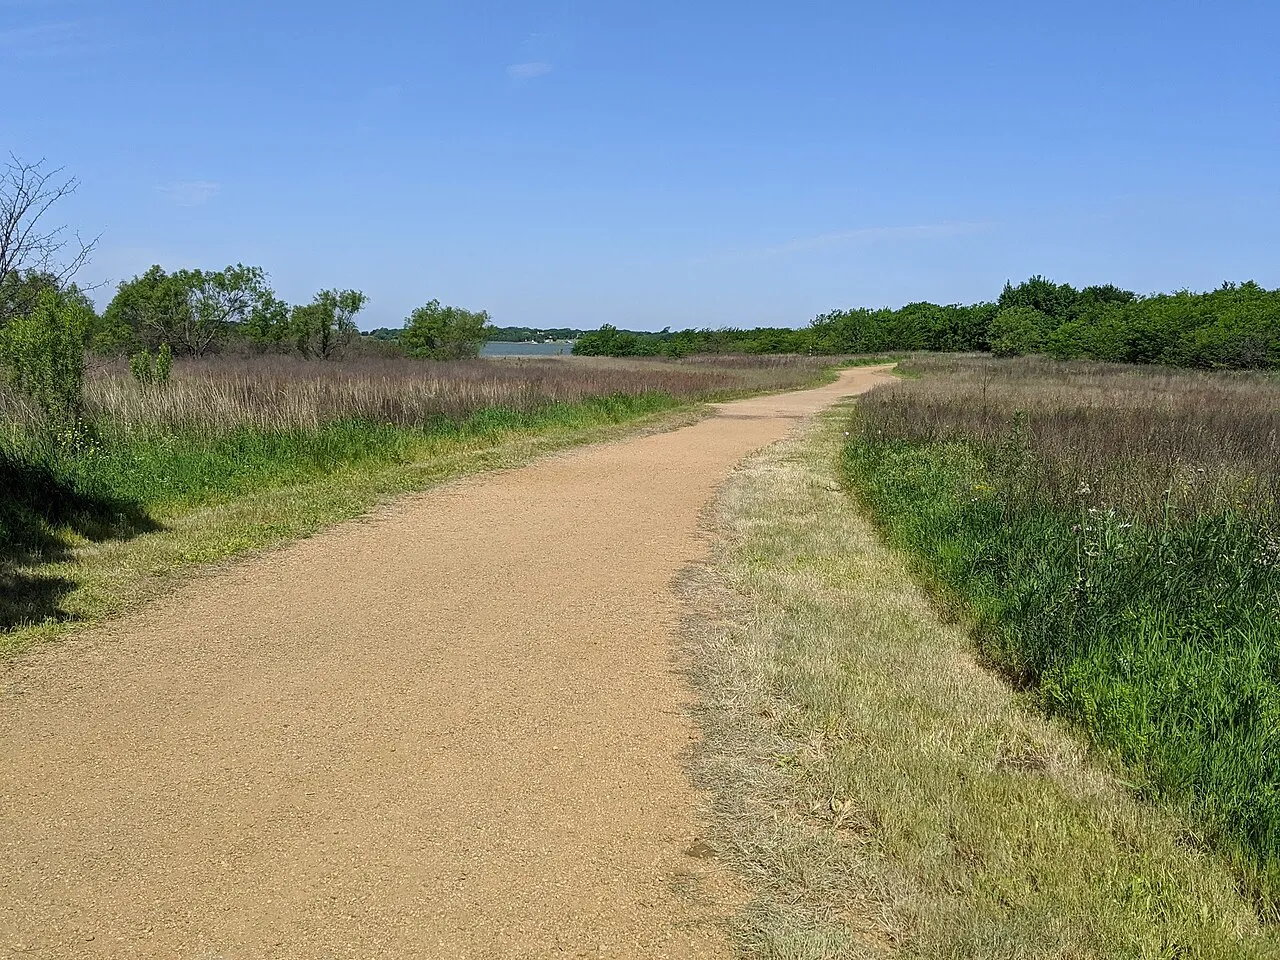
The city’s Ridgepointe Park facility page lists access to the Shoreline Trail. Confirm the trailhead and allowed parking for your approach when setting a meeting point. A nearby park facility and the actual trail entrance may use different cues on a map. If someone is traveling with you separately, provide the location of the entrance you have verified and explain where people should wait if they arrive early. The licensed archival photograph with this guide shows a trail at Ridgepointe Park as it appeared when the image was taken.
Once at the trailhead, notice how the path changes as you leave the first visible park area. The route may fit into the edge of natural land even when the access feels like part of a neighborhood. Ask a younger visitor to watch for one planned sign and one natural feature, such as a seeding grass or visible stretch of water. Keep the observation within the public path. Remind the person making notes to mark the point where the group turns back, so the route can be repeated without relying on a saved phone estimate.
Check what Stewart Creek Park adds to the same outing
The city’s Stewart Creek Park visitor page describes a fee-paid park and publishes its current operations, permits and hours. Check those details before selecting this starting point, particularly if your plan depends on a vehicle entrance or a late return. The Stewart Creek Park map labels the Shoreline Trail and multiple other park destinations. Plan the approach you intend to use, since an arrival aimed at a picnic area or boat launch may require a different walk to the trail.
Decide whether you want the park visit, the trail or both. If most of the group wants to spend time near a confirmed gathering area, a short trail segment can follow without anyone having to set out for Ridgepointe. If the main purpose is the hike, identify the start and return before filling up the schedule with other activities. Check any same-day information the city has posted and make sure the group has time to return to its own route out. A point that is convenient for turning around on foot can be much farther from the car than it first appeared on the screen.
Compare what the edge of the lake offers on each route
Make one observation you can repeat from either end. You could look for the first reachable public spot where the trail opens to a view of the water. Record whether trees or low vegetation are visible between you and the lake, and what direction you were facing if you can establish it. A photograph may show the distance to an open view eventually, but a plain note about the walking surface, shade and turns can explain more to somebody deciding whether to try the same stretch.
Choose a second observation related to use. Note where you can pause without blocking pedestrians or cyclists and what practical feature helped you recognize the turnaround. It might be a change in surface or a properly identified junction. A landmark such as one small flowering plant can look different a season later, so use it as a nature observation rather than your only navigation reference. Keep walking along the public route if you see a shoreline or neighboring property you cannot reach through a signed path.
Check conditions before expecting the map to match the ground
Recent rain, high water or damage can change what a route is like on a particular day. Look at official notices and posted signs, stay clear of closed areas and reconsider the plan if the accessible options differ from what you expected. If somebody needs a particular surface, distance or place to rest, ask the city about the intended stretch before saying it will be suitable. A map may identify facilities without telling you the condition of the approach between them. Keep a shorter alternative in the same confirmed park area whenever it fits the group.
Plan around the amount of daylight and the weather the group can comfortably manage. Bring only what everybody needs for an ordinary outing and keep the return time visible. If you use a phone map, save the key official route information before leaving so the group can identify its access point even if a link loads slowly. Where a closure or unclear branch prevents the walk you planned, use a recognized return. An exploratory first visit does not depend on finding a way around a barrier.
Share the route with other users and leave views intact
The city calls the Shoreline Trail a hike-and-bike route. Follow posted guidance for passing and yielding. If you want to look closely at a view or compare two routes on a phone, stand where you leave enough room for other people to continue. A trail entrance can be busy with people getting oriented at once. Have the group gather at the authorized point you chose, give everyone the same short directions and move away from through traffic once you start.
Keep observations at a distance appropriate to wildlife. A bird or other animal that can be seen from the path makes a useful record without following it into vegetation. If the shoreline looks different on a repeat visit, use the public route to compare visibility and conditions. Take your litter out and observe posted rules for dogs and equipment. Someone joining the outing later can use an accurate route description with one fixed landmark without receiving a list of places to leave the marked path.
Save a note that makes the second visit easier
Write the chosen park, confirmed access, turnaround and date. Record how long you spent including stops, and whether a condition such as wet ground changed the walk. Next time, the group can repeat the same stretch or decide which section to try from the opposite end. Compare both notes against the official map. If a particular intersection or park amenity belongs to one outing, keep it associated with that entry point. This is especially helpful when somebody who was not there prepares to start from another location.
Before committing to a longer route, confirm its destination, access conditions and how everyone will return. A one-way plan requires an actual way back from the end you choose. Otherwise make the outing to a familiar turning point with enough time to retrace it. Learning the trail in pieces gives each visit its own endpoint and makes it easier to recognize which people, timing and conditions fit the next one.
Look up The Tribute as a separate outing
If another visitor says they started at The Tribute, compare the name they used with the city’s listing. The city describes The Tribute Shoreline Nature Trail as another hike-and-bike route with its own length and an overlook on a peninsula. A photograph from that endpoint can be a reason to plan a different trip. It is not a landmark to count on from the Ridgepointe access or Stewart Creek Park. Ask which actual access point was used before trying to match somebody’s photograph to your own map.
Use the trail directory to confirm the starting location when moving from the original route to the other system. Tell another person whether the plan takes them to a specific park or to the access for The Tribute. If somebody has only a short window on a second day, keep the same approach of selecting the public access and turnaround before setting out.
Find more local outings in The Colony Beacon archive.
Sources
- City of The Colony’s trail directorythecolonytx.gov
- city’s Shoreline Trail mapthecolonytx.gov
- Ridgepointe Park facility pagethecolonytx.gov
- Stewart Creek Park visitor pagethecolonytx.gov
- Stewart Creek Park mapthecolonytx.gov